
Cherry Bliss Chill Bars Recipe: A Refreshing Delight
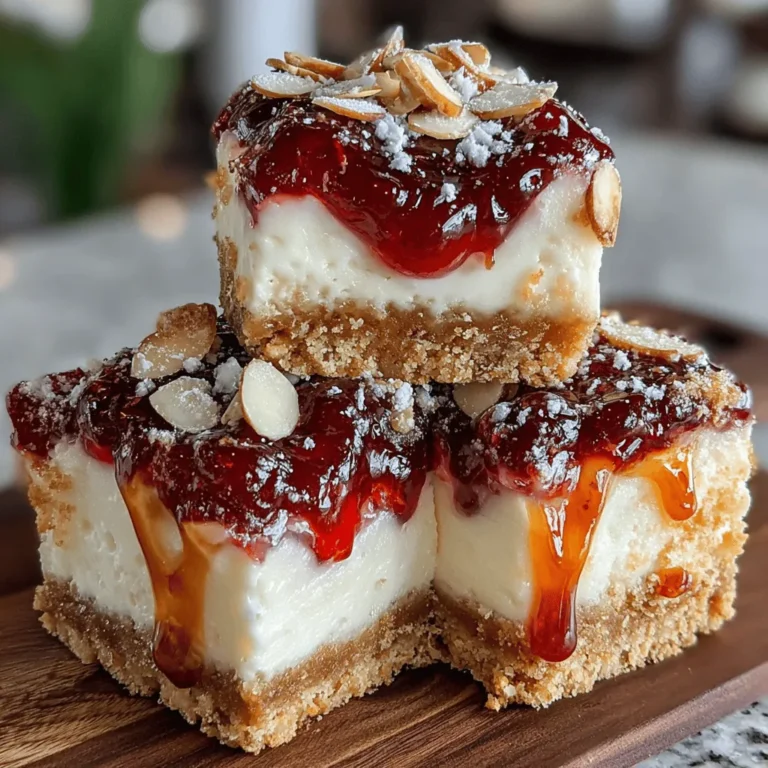
When it comes to desserts that leave an impression, Cherry Bliss Chill Bars are a standout choice. This no-bake treat combines the tart sweetness of cherries with a creamy filling and a crunchy crust, making it a delightful addition to your dessert repertoire. Easy to prepare and visually appealing, these bars are perfect for any occasion, whether you’re hosting a summer barbecue, planning a picnic, or simply looking to impress family and friends at a gathering.
The refreshing nature of Cherry Bliss Chill Bars makes them particularly appealing during warmer months, but their vibrant cherry flavor and creamy texture are enjoyable year-round. As you dive into this recipe, you’ll find that it not only satisfies sweet cravings but also adds a touch of elegance to your dessert table.
Understanding the Ingredients
Before we jump into the preparation, it’s essential to understand the key ingredients that contribute to the deliciousness of Cherry Bliss Chill Bars. Each component plays a vital role, enriching the overall flavor and texture of the dessert.
Graham Cracker Crumbs: The foundation of the crust, graham cracker crumbs are crucial for creating a flavorful base. Their subtle sweetness and slightly nutty flavor provide a perfect contrast to the creamy filling and the tart cherry topping. Opt for finely crushed crumbs to ensure a smooth crust that holds together well.
Unsalted Butter: Butter is a key ingredient that binds the graham cracker crumbs together. By using unsalted butter, you maintain control over the saltiness of the dish, allowing the natural flavors of the other ingredients to shine. The melted butter, when mixed with the crumbs, creates a rich and cohesive crust that serves as the perfect canvas for the creamy filling.
Granulated and Powdered Sugar: The balance of sweetness in Cherry Bliss Chill Bars comes from a combination of granulated and powdered sugar. Granulated sugar is used in the crust, providing a slight crunch, while powdered sugar is mixed into the filling. This fine sugar dissolves effortlessly, contributing to the smooth texture of the creamy layer without any grittiness.
Cream Cheese: A staple in many dessert recipes, cream cheese adds a rich, velvety texture and a subtle tanginess to the filling. It’s essential to use softened cream cheese to ensure easy blending with the other ingredients, resulting in a smooth and luscious filling that perfectly complements the cherry topping.
Whipped Topping: To achieve the light and airy texture that makes Cherry Bliss Chill Bars so delightful, whipped topping is incorporated into the filling. This ingredient not only adds volume but also enhances the overall mouthfeel, making each bite a refreshing experience.
Cherry Pie Filling: The star of the show, cherry pie filling, brings vibrant color and a burst of flavor to the bars. You can use store-bought filling for convenience, or if you’re feeling adventurous, homemade cherry pie filling can elevate the taste even further, allowing you to control the sweetness and tartness to your liking.
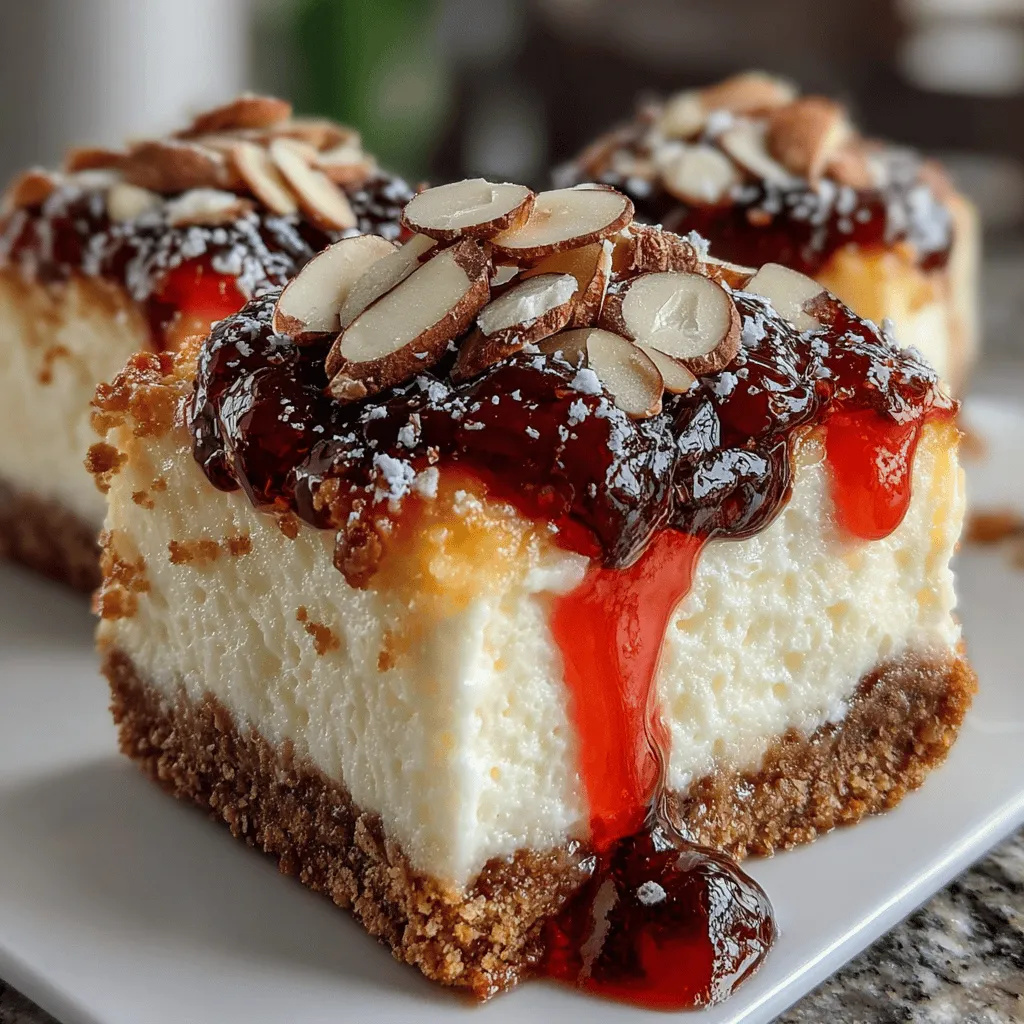
Slivered Almonds (optional): For those who enjoy a bit of crunch and nutty flavor, slivered almonds can be added as a topping. They provide an extra layer of texture that complements the creamy filling and juicy cherries beautifully.
Step-by-Step Preparation
Now that we’ve explored the key ingredients, let’s dive into the step-by-step preparation of Cherry Bliss Chill Bars. Follow these detailed instructions for an effortless yet impressive dessert.
Step 1: Preparing the Crust
1. Gather Your Ingredients: Start by gathering all the necessary ingredients for the crust. You will need graham cracker crumbs, granulated sugar, and melted unsalted butter.
2. Crush the Graham Crackers: If you’re starting with whole graham crackers, place them in a food processor and pulse until finely crushed. Alternatively, you can place the crackers in a resealable plastic bag and crush them with a rolling pin. Aim for a fine crumb to ensure a smooth crust.
3. Mix the Ingredients: In a medium mixing bowl, combine the crushed graham crackers with granulated sugar. Mix well to ensure the sugar is evenly distributed.
4. Add Melted Butter: Pour the melted unsalted butter into the graham cracker mixture. Stir until all the crumbs are thoroughly coated, and the mixture resembles wet sand. It should hold together when pressed.
5. Press the Mixture into the Pan: Line a 9×13-inch baking dish with parchment paper for easy removal. Transfer the graham cracker mixture into the prepared dish and press it evenly into the bottom. Use the back of a measuring cup or your hands to pack it down firmly, ensuring there are no gaps.
6. Chill the Crust: Place the crust in the refrigerator for about 10-15 minutes to allow it to set. This step is crucial for achieving a sturdy base that will hold the filling and topping.
As the crust chills, you can prepare the creamy filling, making sure that this delightful treat comes together seamlessly. Stay tuned for the next steps where we’ll blend the filling and add the cherry topping to complete these delicious Cherry Bliss Chill Bars.
Pressing the Base
To create the perfect Cherry Bliss Chill Bars, starting with a solid foundation is crucial. Compacting the crust made from graham cracker crumbs, sugar, and melted butter is essential for ensuring stability and preventing the bars from crumbling when cut. When pressing the base into the baking dish, use the back of a measuring cup or your hands to firmly pack the mixture down. This not only helps create an even layer but also allows the base to hold together well during the chilling process. A well-pressed base will provide the necessary support for the creamy layers above, ensuring each slice maintains its shape when served.
Cream Cheese Layer
Achieving a smooth and creamy filling is vital to the success of your Cherry Bliss Chill Bars. Start with room temperature cream cheese, as this will make it easier to blend and eliminate lumps. Using a mixer—either a stand or hand mixer—beat the cream cheese until it becomes light and fluffy. Gradually add in powdered sugar, mixing until fully incorporated and smooth. For an extra touch of flavor, consider adding a splash of vanilla extract. This simple addition enhances the overall taste and rounds out the sweetness of the bars.
To ensure a velvety texture, scrape down the sides of the bowl during mixing. This helps incorporate all the ingredients evenly, preventing any clumps from forming. Once the mixture is smooth, it’s ready for the next step!
Folding in Whipped Topping
Integrating whipped topping into your cream cheese mixture requires a gentle folding technique to maintain its light and airy texture. Begin by adding a dollop of whipped topping to the cream cheese mixture, stirring to lighten the cream cheese. Then, using a spatula, carefully fold in the remaining whipped topping. The folding motion involves lifting the mixture from the bottom of the bowl and gently turning it over the top, being careful not to deflate the whipped cream.
This technique is essential for achieving a light and fluffy filling, which contrasts beautifully with the rich crust and tart cherry topping. Be patient during this step, and avoid vigorous stirring, as it can lead to a denser texture.
Assembling the Bars
Now that you have your base and filling prepared, it’s time to assemble your Cherry Bliss Chill Bars. Start by pouring the cream cheese mixture over the pressed crust, using a spatula to spread it evenly to the edges of the pan. This ensures that every bite will have the perfect balance of flavors and textures.
To achieve an even distribution of layers, take care to smooth the top with the spatula. Once the cream cheese layer is even, it’s time to add the cherry topping. You can either spoon the cherry filling directly onto the cream cheese layer or dollop it in small sections across the top. Using a toothpick or a skewer, swirl the cherry filling into the cream cheese layer to create a marbled effect. This technique not only enhances the visual appeal but also allows the flavors to meld together beautifully.
Adding the Cherry Topping
The cherry topping is where the real magic happens. You can use canned cherry pie filling for convenience or opt for fresh cherries for a homemade touch. If using fresh cherries, pit and chop them into smaller pieces to distribute evenly across the bars.
For a marbled effect, place spoonfuls of cherry filling on top of the cream cheese layer and use a knife or skewer to gently swirl it in. Be careful not to over-mix; you want to maintain distinct swirls of cherry and cream cheese for a stunning presentation. If you prefer a more layered look, spread the cherry topping evenly over the cream cheese layer without swirling.
Chilling Process
Once assembled, the bars must chill in the refrigerator for at least four hours, or ideally overnight. This chilling time is crucial for allowing the flavors to meld and the layers to set properly. As the bars chill, the cream cheese filling will firm up, making it easier to cut into neat squares.
The chilling process also enhances the flavor, as the cherry topping seeps slightly into the cream cheese layer, creating a delightful combination of sweet and tart in each bite. To prevent any unwanted odors from the refrigerator impacting your dessert, cover the baking dish with plastic wrap or aluminum foil.
Nutritional Insights
When it comes to enjoying Cherry Bliss Chill Bars, it’s helpful to understand their nutritional profile. Each serving typically contains around 200-250 calories, mainly from the crust and cream cheese layer. The balance of sweetness from the sugar and the fat content from the cream cheese and whipped topping provides a satisfying dessert experience.
Healthier Substitutions
If you are looking to lighten the recipe, consider these healthier substitutions:
– Low-Fat Cream Cheese: Using low-fat cream cheese can significantly reduce the overall fat content without sacrificing too much flavor.
– Sugar Alternatives: Substitute granulated sugar with alternatives like stevia or erythritol for a lower-calorie option.
– Graham Cracker Crust Alternatives: For a gluten-free version, opt for almond flour or gluten-free graham crackers.
These adjustments can make your Cherry Bliss Chill Bars a more nutritious option while still indulging your sweet tooth.
Serving Suggestions and Pairings
Cherry Bliss Chill Bars are perfect for various occasions, from summer picnics to holiday gatherings. Their refreshing flavor makes them a hit during warm weather, while their creamy texture can be a delightful treat for family gatherings.
Recommended Beverages
Pair your Cherry Bliss Chill Bars with the following beverages to enhance the experience:
– Iced Tea: A cold glass of iced tea, either sweetened or unsweetened, complements the tartness of the cherries beautifully.
– Sparkling Water: For a refreshing palate cleanser, sparkling water with a squeeze of lemon or lime can be a perfect match.
Presentation Ideas
For an eye-catching display, consider cutting the bars into squares and placing them on a beautiful platter. Garnish with fresh mint leaves or a dusting of powdered sugar for an elegant touch. You can also serve them with extra cherry topping on the side for guests who want to add more flavor to their bars.
Conclusion
Making Cherry Bliss Chill Bars is not only a rewarding culinary experience but also a delightful way to treat yourself and your loved ones. This recipe is simple yet versatile, allowing for various adaptations based on personal preferences or dietary needs. The combination of a crunchy base, creamy filling, and vibrant cherry topping creates a harmonious dessert that is sure to impress.
Whether you’re preparing these bars for a special occasion or simply to enjoy at home, the joy of creating and sharing them is ultimately what makes this recipe special. So gather your ingredients, follow the steps, and indulge in the bliss of these chilled cherry bars. Enjoy the delightful experience of making and savoring Cherry Bliss Chill Bars, and don’t hesitate to share them with friends and family for an unforgettable treat!
