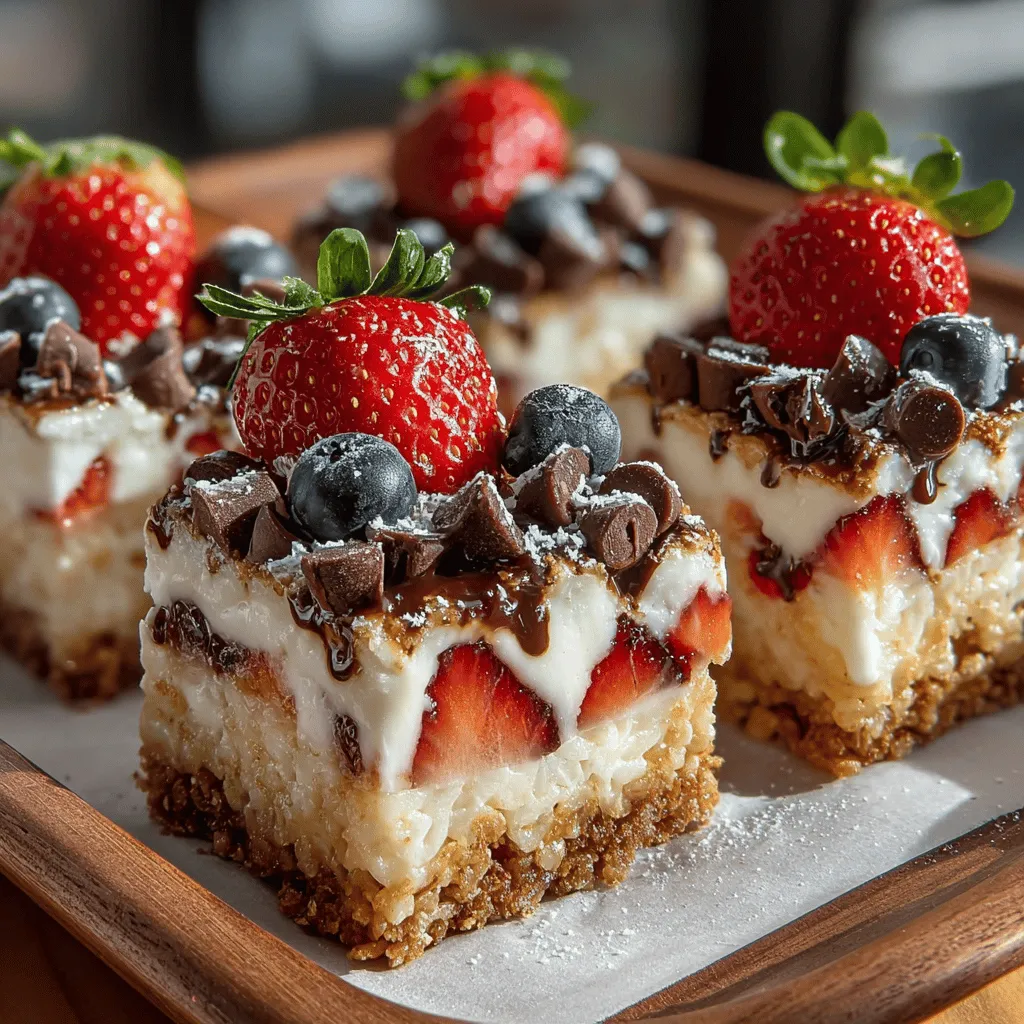
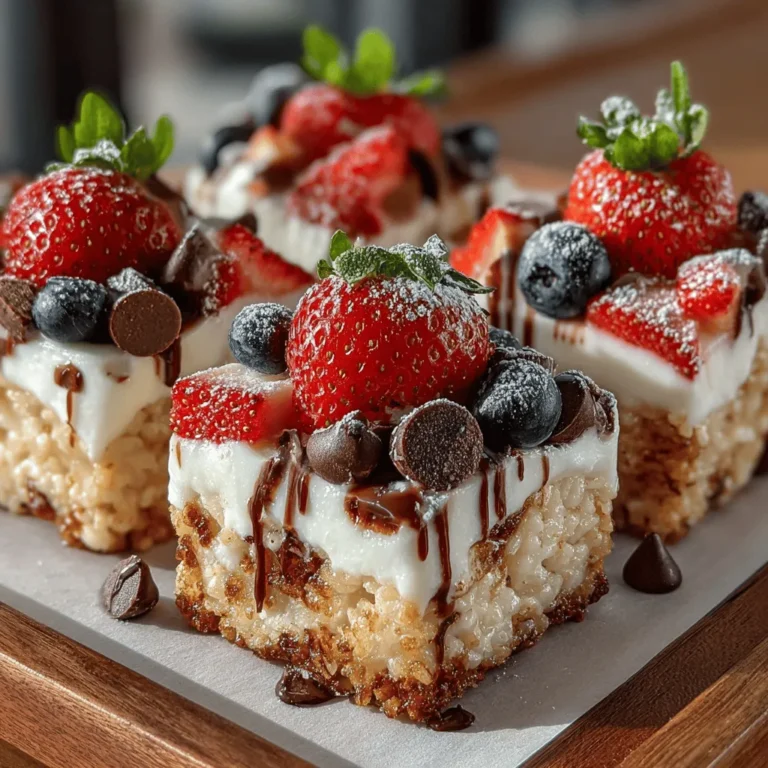
Chilled Delight: Frozen Yogurt Rice Krispie Bites
As the temperatures rise and the sun shines brighter, frozen treats become a staple for many seeking relief from the heat. From popsicles to ice creams, these chilled delights not only provide a refreshing escape but also evoke feelings of nostalgia and joy. Among the plethora of frozen desserts, Frozen Yogurt Rice Krispie Bites stand out as a creative and healthier alternative. These delightful bites combine the classic crunch of Rice Krispies with the creamy goodness of yogurt, resulting in a sweet treat that’s both satisfying and guilt-free.
What makes these bites particularly appealing is their harmonious blend of familiar flavors and textures. The crispiness of the cereal, the chewiness of mini marshmallows, and the richness of peanut butter come together to create a snack that is not only delicious but also packed with nutritional benefits. As we dive into this recipe, let’s explore the ingredients that make these Frozen Yogurt Rice Krispie Bites irresistible and how to prepare them perfectly.
Understanding the Ingredients
To create the perfect Frozen Yogurt Rice Krispie Bites, understanding the role of each ingredient is essential. Here’s a closer look at what goes into this delectable dessert:
Rice Krispies Cereal
The foundation of our bites, Rice Krispies cereal, provides a satisfying crunch that contrasts beautifully with the creamy components. This iconic cereal is made from crisped rice and is known for its light texture and ability to absorb flavors, making it an ideal base for our frozen treat. Not only does it add a delightful crunch, but it also contributes carbohydrates that make these bites a quick energy source.
Mini Marshmallows
These tiny puffs of sweetness play a pivotal role in the overall flavor and texture of the bites. Mini marshmallows melt slightly when mixed with the other ingredients, creating a chewy consistency that complements the crunch of the Rice Krispies. Their sweetness enhances the flavor profile, making the bites even more appealing, especially to kids and adults with a sweet tooth.
Peanut Butter
Adding peanut butter not only enriches the bites with a creamy texture but also infuses them with protein and healthy fats. A great source of energy, peanut butter helps keep you feeling full longer. Furthermore, it introduces a subtle nuttiness that balances the sweetness of the marshmallows and yogurt, making each bite more satisfying.
Honey or Maple Syrup
When it comes to sweetening our Frozen Yogurt Rice Krispie Bites, both honey and maple syrup offer natural alternatives to refined sugars. Honey is known for its antibacterial properties and is rich in antioxidants, while maple syrup contains vitamins and minerals such as zinc and manganese. Choosing either of these natural sweeteners not only enhances the flavor but also adds a touch of healthfulness to the recipe.
Vanilla Extract
Often considered the backbone of many desserts, vanilla extract elevates the flavor complexity of our bites. Its warm, sweet aroma complements the other ingredients, enhancing the overall taste without overpowering it. Using high-quality vanilla extract can make a noticeable difference, so opt for pure extract when possible.
Greek Yogurt
The star ingredient in this recipe is Greek yogurt, which brings a creamy consistency and a wealth of health benefits. Packed with protein and probiotics, Greek yogurt aids digestion and supports gut health. It serves as a healthier alternative to traditional ice cream, allowing you to indulge without the guilt. Its tangy flavor also balances the sweetness of the other ingredients, making it a perfect addition to our bites.
Chocolate Chips and Crushed Nuts
For those looking to add a bit of flair, optional add-ins like chocolate chips or crushed nuts can take these bites to the next level. Chocolate chips introduce a rich, sweet element, while crushed nuts add an extra layer of crunch and flavor. Both options allow you to customize your bites based on personal preferences and dietary needs.
Fresh Fruit
To finish off your Frozen Yogurt Rice Krispie Bites, consider topping them with fresh fruit. Strawberries, blueberries, or bananas not only add vibrant color to the presentation but also pack in additional vitamins and minerals. Fruits are a great way to enhance the nutritional value of your treats while providing natural sweetness and freshness.
Step-by-Step Recipe Instructions
Now that we’ve covered the essential ingredients, let’s dive into the step-by-step process to create your Frozen Yogurt Rice Krispie Bites. This recipe is straightforward, making it perfect for cooks of all skill levels.
Preparing Your Base
Start by gathering all your ingredients and mixing the Rice Krispies and mini marshmallows in a large mixing bowl. It’s important to ensure that the marshmallows are evenly distributed among the cereal, as this will enhance the texture and sweetness of each bite. This initial mixing sets the stage for a well-balanced treat.
Making the Binder
Next, you’ll need to prepare the binding mixture. In a small saucepan, combine the peanut butter and your choice of honey or maple syrup. Heat the mixture over low heat, stirring continuously until it becomes smooth and well-combined. This step is crucial, as it allows the peanut butter to blend seamlessly with the sweetener, creating a sticky binder that will hold the bites together. Aim for a consistency that is neither too runny nor too thick; it should be pourable but still hold its shape.
Mixing Together
Once the binder is ready, pour it over the Rice Krispies and marshmallow mixture. Using a spatula or your hands (dampened to prevent sticking), mix everything thoroughly until all the cereal and marshmallows are evenly coated with the peanut butter mixture. This step is vital for achieving uniform flavor and texture throughout the bites.
Shaping the Bites
After mixing, it’s time to shape your bites. Line an 8×8-inch baking dish with parchment paper for easy removal. Transfer the mixture into the prepared dish and press it down firmly using a spatula or your hands. Make sure to pack it tightly to avoid crumbling later. The denser you pack the mixture, the better your bites will hold together once frozen.
Freezing the Base
Finally, place the baking dish in the freezer for at least 1-2 hours, or until the mixture is solid. Freezing is a critical step, as it helps the bites achieve the perfect texture that is both firm and creamy. Once frozen, you can cut the mixture into squares or bite-sized pieces, depending on your preference.
By following these steps, you will have created a delightful batch of Frozen Yogurt Rice Krispie Bites that are ready to be enjoyed. Whether you’re serving them at a summer gathering or simply indulging in a sweet snack at home, these bites promise to be a hit with everyone. Stay tuned for the next part of the recipe, where we’ll delve into creative variations and tips for serving these delicious treats.